Categories

healthy whole wheat buttermilk chocolate pancakes

Whole Wheat Chocolate Pancakes

healthy whole wheat chocolate pancakes | alidaskitchen.com

Happy Valentine’s Day!  I could not think of a better way to honor this day with you than dishing up a plate of these Whole Wheat Chocolate Pancakes.  Along with a cup of joe and a dish of fresh berries, these pancakes make a wonderful breakfast treat and are not as bad for you as you might think.  A healthy stack comes in around 200 calories, is low in fat, made with 100% whole wheat flour and high in fiber.  I’d say that’s not bad!

healthy whole wheat chocolate pancakes | alidaskitchen.com

These pancakes are nice and light, making them perfect for breakfast, though they can certainly be dressed up for dessert as well. They are not overly sweet, which I like because you can easily adjust the sweetness to your preference with your choice of toppings. We actually enjoyed them plain, but a sprinkle of powdered sugar and some fresh berries is also delicious. Chocolate sauce, whipped cream and chocolate chips would definitely takes these over the top (making them more dessert-like and less healthy, of course).  The options are endless, which is always part of the fun.  Enjoy!

Whole Wheat Chocolate Pancakes
 
Yields: 4-6 servings
Ingredients
  • 1 cup whole wheat pastry flour
  • ¼ cup unsweetened cocoa powder
  • 1 teaspoon baking powder
  • ½ teaspoon baking soda
  • 2 tablespoons turbinado sugar
  • ½ teaspoon salt (omit if using salted butter)
  • 1 egg, lightly beaten
  • 1 cup plus 2 tablespoons low fat buttermilk
  • 2 tablespoons brewed coffee (I used some from my morning decaf)
  • 1 teaspoon vanilla extract
  • 2 tablespoons unsalted butter, melted (I used light butter)
  • Cooking spray
  • Strawberries (optional, for topping)
  • Powdered sugar (optional, for topping)
Instructions
  1. In a large bowl, sift flour, cocoa powder, baking powder, baking soda, sugar and salt. Set aside.
  2. In a medium bowl, whisk together egg, buttermilk, coffee, vanilla and butter.
  3. Add buttermilk mixture to the flour mixture and fold until blended (there may be some lumps). Let sit for 5-10 minutes.
  4. Preheat non-stick skillet over medium and then spray with cooking spray. Pour batter in skillet by the ¼ cupful and cook until bubbles appear (about 3 minutes). Flip and cook on the other side until done (about 2-3 minutes). Repeat with remaining batter. Serve with fresh berries and powdered sugar, as desired.

Adapted from Kiwi, Jan/Feb 2011

Double Chocolate Chip Muffins

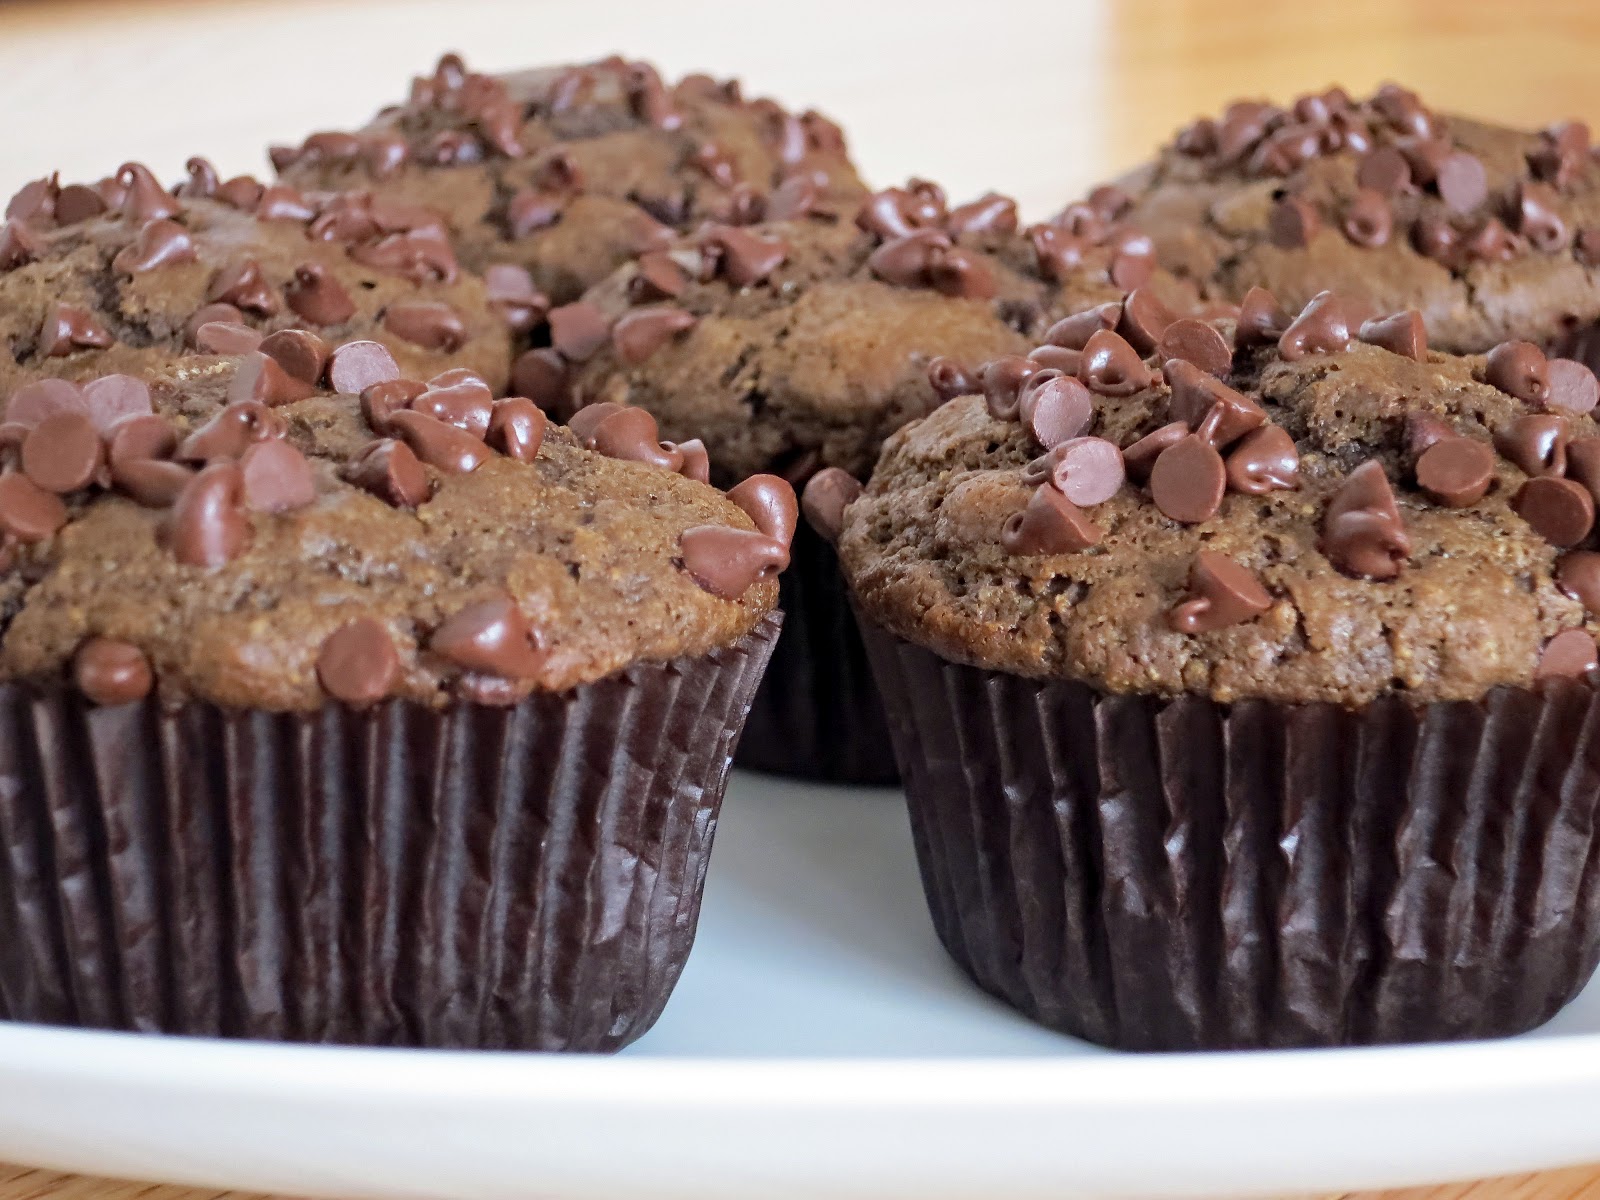
In anticipation of Valentine’s Day, I will be featuring a few chocolate recipes this week.   Of course a little breakfast chocolate is the perfect way to start off any week.  These muffins are more than just a little breakfast chocolate though.  They are chocolate on chocolate.  A chocolate muffin studded with chocolate chips topped with chocolate chips.  What could be better?  Well, they come in under 200 calories and are low fat – a true breakfast treat! 

The original recipe uses red wine vinegar and water, which I thought was intriguing.  Red wine vinegar in baked goods?  I had to try it!  I did, and it was good.  BUT…I have since revised the recipe to replace the vinegar/water with buttermilk.  Nothing compares to the flavor and texture that buttermilk gives to baked goods, and in these muffins that is no exception.  I also replaced some of the all-purpose flour with whole wheat in order to bump up the nutrition level a bit.

For a little variety, it is fun to change up the chips with different flavors (peanut butter chips anyone?) but I always find myself coming back to the mini chocolate chips.  Mini chips give the illusion of more chocolate per bite since there are more bits throughout.  A little more for less kind of thing. 

Chocolate-Chocolate Chip Muffins
Yields 12 muffins

Ingredients

1 cup all-purpose flour
3/4 cup whole wheat pastry flour
1/2 cup brown sugar, packed
1/4 cup cocoa powder
1 teaspoon baking powder
1 teaspoon baking soda
1/4 teaspoon salt
1 cup buttermilk
1/4 cup canola oil
1 teaspoon vanilla extract
1 egg, lightly beaten
1/2 cup semi-sweet mini chocolate chips, divided

Directions

  1. Preheat oven to 400 degrees.  Line 12 muffin cups with paper liners (or spray muffin tin with cooking spray).
  2. In a large bowl, mix flours, sugar, cocoa, baking powder, baking soda, and salt. 
  3. In a medium bowl, whisk together the buttermilk, oil, vanilla and egg.  Stir in 1/4 cup chocolate chips.
  4. Add buttermilk mixture to flour mixture, gently folding until just combined.
  5. Divide batter evenly among 12 muffin cups.  Sprinkle tops with remaning 1/4 cup mini chocolate chips.  Bake for 15 minutes, or until a toothpick inserted in the center comes out clean.  Let cool in pan for 5 minutes and then move to a wire rack to cool completely.

Adapted from Cooking Light

Lemon Ricotta Muffins

Bring on citrus season!  When life gives me a bowl of lemons, you better believe I’m going to make some muffins!  And perhaps some lemonade to wash them down, but that’s another post all together.  For now it’s all about muffins, as these Lemon Ricotta Muffins definitely deserve the spotlight.  They are bright, perfectly sweet and bonus – they’re low in fat, though you would never know it.  The ricotta cheese gives the muffins a moist, soft texture, and the flavor goes perfectly with the lemon.  The taste is reminiscent of delicious lemon ricotta pancakes, only a bit more portable.

With the wonderful citrus bounty upon us, over the next few weeks I will be sharing several recipes using citrus fruits.  In the meantime, grab those lemons and give these muffins a try!

Lemon Ricotta Muffins
 
Yields: 12 muffins
Ingredients
  • 1 cup all-purpose flour
  • ¾ cup whole wheat pastry flour
  • ¾ cup granulated sugar
  • 2½ teaspoons baking powder
  • ¼ teaspoons salt (optional)
  • ¾ cup low fat ricotta cheese
  • ½ cup water
  • ¼ cup canola oil
  • 2 tablespoons fresh lemon juice
  • 1 tablespoon fresh lemon zest
  • 1 egg, lightly beaten
  • 1 teaspoon vanilla extract
  • 2 tablespoons turbinado sugar
Instructions
  1. Preheat oven to 375 degrees. Prepare 12 muffin cups with paper liners or cooking spray. Set aside.
  2. In a large bowl, mix the flour, sugar, baking powder and salt. Make a well in the center.
  3. In a medium bowl, whisk the ricotta, water, oil, lemon juice, lemon zest, egg, and vanilla until blended.
  4. Fold the ricotta mixture into the flour mixture until just blended.
  5. Divide batter evenly among muffin cups. Sprinkle turbinado sugar over the tops of the muffins.
  6. Bake for 16 minutes, or until a toothpick inserted in the center comes out clean. Let muffins sit in pan for 5 minutes and then remove to wire rack to cool completely.

Adapted from Cooking Light

Chocolate Malt Muffins

chocolate malt muffins with chocolate malted milk powder

I had a lot of leftover malt powder after making Triple Chocolate Malted Cookies.  While I’m sure Mike would love if I used it up making several batches of his favorite cookie, I had other ideas.  One of them, of course, being muffins!  These muffins were a fun change from our usual breakfast.  The malt flavor was not overwhelming, and the chocolate chips gave a little extra interest.  A little chocolate for breakfast can’t be a bad thing, right?  Definitely not if that means enjoying these muffins!

Chocolate Malt Muffins
 
Yields: 12 muffins
Ingredients
  • 1¾ cup all-purpose flour
  • ½ cup chocolate malt powder (plus 2 teaspoons for topping)
  • ⅓ cup granulated sugar (plus 2 teaspoons for topping)
  • 1 tablespoon baking powder
  • ⅓ cup canola oil
  • ¾ cup buttermilk
  • 1 egg
  • 1 teaspoon vanilla
  • ⅓ cup semi-sweet chocolate chips
Instructions
  1. Preheat oven to 400 degrees. Prepare muffins tin (line cups or spray with cooking spray). In a small bowl, mix 2 teaspoons malt powder and 2 teaspoons granulated sugar. Set aside.
  2. In a large bowl, whisk the flour, malt powder, sugar and baking powder until combined.
  3. In a separate bowl, mix the oil, buttermilk, egg and vanilla.
  4. Add the milk mixture to the flour mixture and fold gently until just combined; gently fold in chocolate chips.
  5. Divide batter evenly among 12 muffin cups. Sprinkle with malt powder/sugar mixture.
  6. Bake for 15-20 minutes, or until a toothpick inserted in the center comes out clean. Cool in pan for 5 minutes. Remove to wire rack to cool completely.

Adapted from weewelcome

Coconut Cranberry Muffins

I had been craving something with coconut for some time, and it occurred to me that coconut paired with cranberries would be a lovely combination.  Cranberries are so wonderful in the wintertime. They add beautiful, seasonal color, as well as a delightful zing to any dish.  Of course, my next thought was…let’s make muffins! 

The sweetness of the coconut was the perfect counterbalance to the tangy cranberries.  The whole family loved these, especially Adam (though at first, the cranberries were a bit too surprising).  Adam asked for coconut cranberry muffins every day for weeks.  Quite frankly, an almost 2 year old saying ‘coconut cranberry’ anything is quite possibly the cutest thing ever.  As if you didn’t need another reason to make these…they are just plain good!


Coconut Cranberry Muffins
Yields 18 muffins

1 cup all-purpose flour
1 cup whole wheat pastry flour
3/4 cup sugar
1/2 cup sweetened flaked coconut
1 tablespoon baking powder
1 teaspoon baking soda
1/4 teaspoon salt
2 eggs
1 1/4 cup buttermilk
1/4 cup canola oil
1 teaspoon vanilla extract
1 cup cranberries, chopped
1/4 cup sweetened flaked coconut, for topping

  1. Preheat oven to 400 degrees.  Prepare 18 muffin cups with liners or cooking spray.  Set aside.
  2. In a large bowl, stir flours, sugar, coconut, baking powder, baking soda and salt, until combined.
  3. In a medium bowl, whisk together eggs, buttermilk, oil and vanilla.
  4. Add buttermilk mixture to flour, gently folding until combined.  Fold in cranberries.
  5. Divide batter evenly among muffin pan.  Sprinkle with remaining coconut.  Bake for 15-20 minutes, or until toothpick inserted in the center comes out clean. 

Adapted from Food.com

Linked to Sweet as Sugar Cookies: Sweets for Saturday #50

Banana Graham Muffins

Banana Graham Cracker Muffins

One of the reasons I often make muffins or quick breads is so that Mike can take breakfast on-the-go.  With this lastest muffin creation, I wanted to make something that Adam would love as well.  It definitely did not take me long to come up with this one.  It is no secret that toddlers love bananas and toddlers love graham crackers.  So why not put the two together in a muffin to create the ultimate toddler treat!

Banana Graham Cracker Muffins

I must confess that Adam is not the only banana and graham cracker lover in this house ~ yours truly is a huge fan as well.  These muffins definitely did not disappoint!  The crushed graham crackers definitely add a tasty spin on an otherwise simple banana muffin recipe.  In fact, they ended up being a nice combination of the two flavors.  They were not overly graham cracker-y but also not like banana bread.  I added some cinnamon, which ended up very subtle in this recipe.  That amount could be doubled if you’re looking for something cinnamony to go with your banana and graham.

So did Adam love them?  He sure did!  In fact, we all did, and I hope you do too!

Banana Graham Muffins
 
Yields: 12 muffins
Ingredients
  • 1 cup crushed graham crackers
  • 1 cup all purpose flour
  • 2 ½ teaspoons baking powder
  • ½ teaspoon baking soda
  • 1 teaspoon ground cinnamon
  • ½ teaspoon salt
  • ¼ cup granulated sugar
  • 3 medium overripe bananas, mashed (about 1 cup)
  • ¼ cup buttermilk
  • 1 egg, lightly beaten
  • ¼ cup canola oil
  • 1 teaspoon vanilla extract
Instructions
  1. Preheat oven to 350 degrees. Line standard muffin tin with paper liners (or spray with cooking spray. Set aside.
  2. In a large bowl, combine the graham crackers, flour, baking powder, baking soda, cinnamon, salt and sugar.
  3. In a separate bowl, combined the mashed bananas, oil milk, egg anv vanilla.
  4. Make a well in the center of the dry ingredients and add the wet ingredients, folding gently until combined (be careful not to over mix).
  5. Divide batter evenly among muffin cups. Bake for 15-18 minutes, or until a toothpick inserted in the center comes out clean.

Adapted from Baking Vintage

no sugar healthy whole wheat pumpkin banana pancakes for toddlers

Pumpkin Banana Pancakes

no sugar healthy whole wheat pumpkin banana pancakes for toddlers

Here are the Pumpkin Banana Pancakes I alluded to in yesterday’s post.  Thankfully I did not lose the eggs and was able to make them.  It’s a good thing too.  I was excited to try a new spin on an old recipe, and Adam absolutely LOVED them!  Similar to Pumpkin Banana Bread, these definitely taste like a cross between pumpkin pancakes and banana pancakes.  Not a bad thing if you ask me!

The recipe made around 50 small-ish pancakes.  I typically make a huge batch for the freezer and package them in groups of 6 (enough for a few days in each bag).  I figured Adam would eat 1 or 2, and I would have the rest to use for pictures during nap time.  Well…that morning he ate 4. Then he asked for another one for snack.  This left me with 1 pancake for pictures.  I couldn’t quite take a picture of just 1 pancake, so I decided to do pictures the next day and took out another 6-pack from the freezer.  Of course, what did Adam do the next day?  He ate 4 pancakes!  I feared having fewer, so I made do with the 3 that remained.  I’m just so glad he likes them.  I hope you do too!

Pumpkin Banana Pancakes
 
Ingredients
  • 1¾ cup whole wheat pastry flour
  • 1 tablespoon baking powder
  • 2 teaspoons pumpkin pie spice
  • 2 eggs
  • 1 cup pumpkin puree
  • 2 medium ripe bananas, mashed
  • 2 cups milk (whole, skim, 1%, whatever you like)
  • 3 tablespoons canola oil
  • 1 teaspoon vanilla
  • Cooking spray
Instructions
  1. In a large bowl, stir and sift flours, baking powder and pumpkin pie spice.
  2. In another bowl, beat eggs with pumpkin, banana and vanilla. Add milk and oil and mix until smooth.
  3. Fold pumpkin mixture into dry ingredients. Let sit for 10 minutes.
  4. Meanwhile, preheat griddle to medium heat and spray with cooking spray.
  5. Drop pancake batter by the generous tablespoonful onto griddle. Cook until bubbles appear (about 2-3 minutes). Flip and cook until set (about 2-3 minutes). Repeat.
Notes
These freeze really well. I store them in a plastic baggie in groups of 6, with each pancake separated by wax paper squares. I then put all of the plastic baggies in a freezer bag.

Layered Pumpkin Loaf

Layered Pumpkin Loaf - a delicious pumpkin bread with a cream cheese swirl in the middle.  So good!

Layered Pumpkin Loaf is a delicious and easy recipe for pumpkin bread with a cream cheese swirl in the middle.

For the longest time, Mike and I would get ‘Pumpkin Loaf’ from everybody’s favorite coffee shop (you know, the one with the green logo).  While that bread is good, I dare say that I prefer this Layered Pumpkin Loaf.  Perhaps it’s the moist and flavorful bread, or perhaps it’s the cream cheese layer resting in the middle.  Regardless of the reason, this is just plain good.

Layered Pumpkin Loaf - a delicious pumpkin bread with a cream cheese swirl in the middle.  So good!

I substituted buttermilk for the skim milk in the original recipe, and I added extra cinnamon in addition to the pumpkin pie spice.  I also added the chopped pepitas on top.  Pepitas are tasty, add some crunch, look pretty, and go perfectly with this bread.

Layered Pumpkin Loaf - a delicious pumpkin bread with a cream cheese swirl in the middle.  So good!

If you will be hosting out of town guests over the holidays, or simply hosting a breakfast/brunch, Layered Pumpkin Loaf would make a lovely addition to your table.

Not sure if you noticed, but I like pumpkin just a little bit. 🙂 This bread is certainly no exception.

Layered Pumpkin Loaf
 
Yields: 9x5 loaf, approximately 16 servings
Ingredients
  • 1 cup canned pumpkin
  • 1 cup plus 2 tablespoons granulated sugar, divided
  • ½ cup packed brown sugar
  • 4 egg whites, divided
  • ½ cup low fat buttermilk
  • ¼ cup canola oil
  • 2 cups all-purpose flour
  • 2½ teaspoons baking powder
  • ½ teaspoon baking soda
  • 2 teaspoons pumpkin pie spice
  • 1 teaspoon cinnamon
  • ¼ teaspoon salt (optional)
  • 1 package (8 ounces) Neufchatel cream cheese (1/3 reduced fat), softened
  • ¼ cup pepitas, chopped (optional)
Instructions
  1. Preheat oven to 350 degrees.
  2. In a large bowl, stir pumpkin, 1 cup granulated sugar, brown sugar, 3 egg whites, buttermilk and oil, until combined.
  3. In a separate bowl, whisk together flour, baking powder, baking soda, spices and salt. Add to pumpkin mixture and fold gently just until moistened.
  4. In a small bowl, beat cream cheese, remaining granulated sugar and remaining egg white until well blended.
  5. Spoon half the pumpkin batter into a 9x5-inch loaf pan sprayed with cooking spray. Spread the cream cheese mixture in a layer over that batter. Top cream cheese layer with remaining pumpkin batter (You will want to spread the top pumpkin layer a little bit with a silicone spatula, but it is ok if a little cream cheese is still visible).
  6. Sprinkle the top layer with chopped pepitas, if desired. It helps to gently pat the pepitas into the batter
  7. Bake for 1 hour to 1 hour 5 minutes, or until a toothpick inserted in the center comes out clean. Loosen bread from sides of pan; cool in pan for 10 minutes. Remove from pan to wire rack; cool completely.

Adapted from Kraft

Peanut Butter Surprise Muffins

It has been far too long since I have made something with peanut butter.  I thought these Peanut Butter Surprise Muffins would be a good way to curb any peanut butter withdrawal.  You know anything with ‘surprise’ in the title is going to be something special (good or bad I suppose, but I promise only good things for you).

First you have a peanut butter muffin, which by itself would be quite delicious.  Add a surprise in the middle (in the form of a mini peanut butter cup), and you have something that is just plain fun and tasty too!

Peanut Butter Surprise Muffins

Yields 12 muffins

1 1/2 cups all-purpose flour

1/2 cup brown sugar, packed
3 teaspoons baking powder
pinch salt (optional)
2 eggs
2/3 cup buttermilk
1 teaspoon vanilla extract
1/2 cup natural peanut butter (chunky or creamy)
2 tablespoons butter, melted
12 miniature peanut butter cups 
1/4 cup chopped peanuts (optional, for topping)
  1. Preheat oven to 400 degrees.  Prepare a 12-cup standard muffin tin with paper liners or cooking spray.
  2. In a large bowl, mix flour, sugar, baking powder and salt until combined.
  3. In a separate bowl, which together eggs, buttermilk and vanilla.  Stir into flour mixture until just moistened.
  4. Combine butter and peanut butter.  Fold into batter (do not over mix).
  5. Fill each muffin cup 1/4 full with batter.  Place a mini peanut butter cup on top of each.  Cover with remaining batter.  Sprinkle tops with chopped peanuts, if using.
  6. Bake for 18-20 minutes, or until a toothpick inserted into muffin comes out clean.  Cool for 5 minutes before removing from pan to wire rack to cool completely.

Adapted from Taste of Home

healthy skinny pumpkin pie without crust

Crustless Pumpkin Pie

Crustless Pumpkin Pie
Crustless Pumpkin Pie is a delicious, pumpkin pie made a little healthier without the crust. This is always a favorite dessert and is a lighter, healthier alternative to a traditional pie.   A must-make for the holidays!

Usually by the time Thanksgiving rolls around, I have made at least 6 pumpkin pies…and enjoyed them immensely, of course. Now, before you think I’m some crust-making machine, I must confess to you that my pumpkin pies are made without crust. This Crustless Pumpkin Pie is a recipe that I found years ago, and frankly it is pure genius. By eliminating the extra step of making crust and the excess fat and calories that come with the crust, you are left with a simple, delicious and “skinny” pumpkin pie!

This pie is so good and very easy to make.  In fact, this is so easy to make, the first time I made it I put everything (minus the topping) in a blender.  It turned out great!  These days, I don’t have a blender, and I’m a little more cautious when baking.

Made with pumpkin and skim milk, you are left with a healthier alternative to your traditional pumpkin pie.  It is no wonder that once pumpkin season hits, I have this pie in the fridge all the time.  I have tweaked the recipe over the years to what it is today, and Mike and I are in pie-heaven all fall/winter long.

healthy skinny pumpkin pie without crust

Crustless Pumpkin Pie
 
Yields: 8 servings
Ingredients
Brown Sugar Topping
  • ¼ cup brown sugar, packed
  • ¼ cup rolled oats
  • 1 tablespoon light butter, softened (I use Smart Balance light, from a tub)
  • ¼ teaspoon cinnamon
Pie
  • 1 can (15 ounces) pumpkin puree
  • 1 can (12 ounces) evaporated skim milk
  • 2 eggs (or 3 egg whites)
  • ½ cup brown sugar
  • ½ cup whole wheat pastry flour or all-purpose flour
  • ¾ teaspoon baking powder
  • 1½ teaspoons pumpkin pie spice
  • ½ teaspoon cinnamon
Instructions
  1. Preheat oven to 350 degrees. Spray 9-inch pie plate with cooking spray and set aside.
  2. Prepare Brown Sugar Topping: mix oats, brown sugar, oats and cinnamon until combined. (I have found that, while messy, using my fingers to mix the topping works best). Set aside.
  3. In a large bowl, mix pumpkin, evaporated milk, eggs and sugar until combined.
  4. In a separate bowl, whisk together the flour, baking powder and spices. Add to pumpkin mixture and gently fold until incorporated.
  5. Pour pumpkin mixture into prepared pie plate. Sprinkle Brown Sugar Topping over the top. Bake for 50-55 minutes. Cool for 15 minutes, and then move to refrigerator for at least 4 hours to overnight.

Adapted from Betty Crocker