Categories

Baked Cinnamon French Toast | alidaskitchen.com

Baked Cinnamon French Toast

baked cinnamon french toast from Alida's Kitchen

Baked Cinnamon French Toast is a decadent yet simple breakfast (or breakfast for dinner, as we talked about yesterday).  Made with cinnamon swirl bread that is drenched and baked into a rich custard, Baked Cinnamon French Toast toast is beyond delicious.  It takes 10 minutes to prepare and then you can bake it right away since this is not an overnight French toast.  While it’s not an overnight variety, you certainly can make it ahead and store covered in the refrigerator until you’re ready to bake

baked cinnamon french toast casserole | alidaskitchen.com


This Baked Cinnamon French Toast is not something that I would have every day, simply because I like to have my boring old breakfast of old fashioned oats with a banana every day.  But this French toast is definitely a wonderful treat worth enjoying for a special occasion…like perhaps for Mother’s Day this Sunday (hint hint Mike!)

Baked Cinnamon French Toast
 
Yields: 6 servings
Ingredients
  • Cooking spray
  • 12 slices cinnamon bread or cinnamon raisin bread
  • 2 cups half and half (fat free works fine)
  • 2 eggs
  • 4 tablespoons butter, melted (light better works fine)
  • 1 tablespoon vanilla extract
  • 1 teaspoon ground cinnamon
Instructions
  1. Preheat oven to 350 degrees. Spray 13"x9" pan with cooking spray.
  2. In prepared pan, place six slices of bread and top with remaining 6 slices of bread.
  3. In a large bowl, whisk together half and half, eggs, butter, vanilla and cinnamon. Pour over bread, pressing bread down so some liquid is absorbed.
  4. Bake for 45 minutes until bread is golden brown. Sprinkle with powdered sugar, if desired.

Source: I Can’t Believe It’s Not Butter

Mini Deep-Dish Pizzas made in a muffin tin

Mini Deep-Dish Pizzas

Individual deep dish muffin tin pizzas
Mini Deep-Dish Pizzas are fun, little individual deep dish pizzas made in a muffin tin.  First you roll out little pizza dough circles and then gently put them in the muffin cups.  Then fill each dough round with your desired sauce and toppings and then top it with cheese.   I used premade dough (from Trader Joe’s), topped them with a marinara sauce, broccoli, red onion and mozzarella cheese, and they came together in less than 30 minutes.  These Mini Deep-Dish Pizzas are completely customizable with your favorite sauce and toppings.  Mini Deep-Dish Pizzas are a definite crowd-pleaser. Besides – there is always something fun about anything in miniature!


Today I am being featured over at Momma’s Meals where I’m being featured as part of Tammi’s Featured Fridays series!  Every Friday, Tammi gets to know her fellow bloggers and makes one of their recipes to share with her family and then with her readers.

I thought it would be fun to make something from Tammi’s site to share with you, and her Individual Deep Dish Pizzas were perfect!  Incidentally I had been looking at an Everyday Food recipe for little deep dish pizzas made in a muffin tin, so these Mini Deep-Dish Pizzas that I’m sharing with you is sort of a combination of the two recipes.

Mini Deep-Dish Pizzas
 
Yields: 12 pizzas
Ingredients
  • Cooking spray
  • All-purpose flour, for rolling
  • 1 pound pizza dough (homemade or store-bought) - in 12 pieces
  • Salt and pepper
  • 1 cup pizza sauce (I used a homemade marinara sauce)
  • Your favorite pizza toppings - about 1 to 2 tablespoons per pizza (I used chopped broccoli and red onion)
  • 1 cup shredded part-skim mozzarella cheese
Instructions
  1. Preheat oven to 450 degrees. Spray 12 standard muffin cups with cooking spray. Set aside.
  2. On a lightly floured surface, roll out each piece of pizza dough into 6-inch circles. Place into prepared muffin cup, gently pressing dough into bottom and up the sides. Season with salt and pepper as desired.
  3. Put 1 tablespoon sauce in each dough cup. Top sauce with 1 to 2 tablespoons of pizza toppings and then top with cheese.
  4. Bake until dough is browned and crisp, approximately 12 minutes. Let cool for 2-5 minutes before removing from cups.


Sources:  Everyday Food,September, 2010 and Momma’s Meals

Baked Dorito-Crusted Chicken

baked dorito-crusted chicken | alidaskitchen.com


Baked Dorito-Crusted Chicken came to me in a dream, which is funny because I’m typically not a flavored chip person (except for salt ‘n vinegar…yum!)  I dismissed it as a quirky pregnancy dream.  That is, until we had a bag of cheese tortilla chips (remember my Green Giant post?), which were just asking to be paired with chicken.

Baked Dorito-Crusted Chicken tastes like…wait for it….yep, you guessed it.  Doritos and chicken.  And it’s really good!  The chicken is moist and juicy.  The salty, cheesy chips give a nice seasoning to the chicken as well.  We were very happy to finally turn my crazy dream into a delicious reality!

baked dorito-crusted chicken

Baked Dorito-Crusted Chicken
 
Yields: 2 servings
Ingredients
  • Cooking spray
  • 1 cup crushed cheese tortilla chips (or any chip will work here)
  • 1 egg, lightly beaten
  • 1 tablespoon milk (I used skim)
  • 2 boneless, skinless chicken breasts (4 to 5 ounces each)
Instructions
  1. Preheat oven to 425 degrees. Line a baking sheet with foil and spray baking sheet with cooking spray.
  2. Put crushed chips in a shallow bowl.
  3. In a separate shallow bowl, whisk egg and milk until combined.
  4. Dip chicken breasts in milk mixture and then dip in chips, coating the chicken. Place on prepared baking sheet and lightly spray tops with cooking spray.
  5. Bake for 15 to 18 minutes, or until chicken is thoroughly cooked.


homemade fig newtons

Oatmeal Fig Bars | Homemade Fig Newtons

oatmeal fig bars | homemade fig newtons
Oatmeal Fig Bars are a chewy, fig-filled bar made on the lighter side.  They taste pretty close to a Fig Newton, but homemade is always better, right?  When I was researching for a healthy fig bar recipe made with oatmeal, I was surprised to find there weren’t many (or rather any that were suitable).  So I decided to take the dough of a oatmeal date bar recipe and replace the date filling with a fig filling.  Because I wanted these to be healthier, I reduced the amount of sugar in the dough and eliminated added sugar from the filling.  In lieu of sugar, I added lemon juice and zest to the filling to brighten the flavor and also act as a thickener.  The result was just what I had in mind for a healthy fig bar, and they were also really simple to make.

When I was making these Oatmeal Fig Bars, I couldn’t help but think about my grandma and grandpa and chuckle.  I’ve talked many times about my grandma and what a wonderful baker she was.  While I’m sure my grandpa loved all of her (delicious!) baked goodies, he always had a stash of Fig Newtons in their pantry.  I really can’t blame him.  Not much beats a Fig Newton (except for these bars of course!.. but I digress).  I don’t think my grandma ever attempted to make a homemade variety of his beloved fig bars, but I’m sure they would have been similar to these…and my grandpa would have stashed these instead!

oatmeal fig bars | homemade fig newtons

Oatmeal Fig Bars | Homemade Fig Newtons
 
Yields: 16 bars
Ingredients
  • 1 cup chopped dried figs, stems removed (8 ounces)
  • ½ cup water
  • 1 tablespoon lemon juice
  • 1 teaspoon lemon zest
  • 1½ cups rolled oats (I used quick oats)
  • 1 cup all-purpose flour
  • ¾ cup packed brown sugar
  • ½ teaspoon baking soda
  • ¼ teaspoon salt
  • ⅓ cup butter, melted (I used light butter)
  • 1 egg white
  • Cooking spray
Instructions
  1. In a small sauce pan, put figs, water, lemon juice and zest, and bring to a boil. Simmer until mixture starts to thicken (about 3 minutes). Let cool for about 5 minutes.
  2. Put filling in food processor and process until smooth. Set aside.
  3. Preheat oven to 350 degrees. Spray a 8-inch baking pan with cooking spray and set aside.
  4. In a large bowl, whisk together oats, flour, sugar, baking soda and salt.
  5. Add butter and egg white to oat mixture and stir until combined.
  6. Press half of the oat mixture into the prepared baking pan. [Note: I used waxed paper to press and spread the mixture into the pan]. Next, carefully spread with fig mixture. Last, drop pieces of remaining oat mixture over the fig mixture so it appears crumbly and then gently pat it down [Note: I used waxed paper for this step].
  7. Bake for 20 to 25 minutes or until lightly browned. Cool on wire rack.

This marks the third installment of the Eating the Alphabet Challenge, hosted by Brenda of Meal Planning Magic.  This month we’re featuring healthy recipes using fruits, vegetables, grains or legumes that start with letters E or F.  This was a no-brainer for me.  I’ve been wanting to come up with a healthy Fig Bar recipe, so this was just the incentive I needed!

vegetarian spinach ravioli lasagna

Easy Ravioli Lasagna

Easy Ravioli Lasagna - takes 10 minutes to prepare using only 5 ingredients.  This is so good!
I am excited to share this recipe with you. Easy Ravioli Lasagna has become one of our favorite weeknight dinners!  It has the delicious flavor of lasagna yet is made with only 5 main ingredients and takes 10 minutes to prepare ~ perfect these days when I find myself juggling a newborn and a busy 3 year old at dinnertime.  This lasagna can also be made ahead (like before leaving for work or, in my case, before the kids wake up) so it’s ready to just pop in the oven at dinner.

Easy Baked Ravoli Lasagna

From the original recipe, I increased the sauce, added some red pepper flakes, and actually reduced the cheese (surprising for a cheese-lover like myself, but it was way too much and took away from the overall dish).  This Easy Ravioli Lasagna is made with spinach, but I think sautéed mushrooms and garlic would also be delicious.  We have made this several times, and it’s always a crowd-pleaser.  Speaking of crowds, this recipe can easily be doubled to fit a 13″x9″ lasagna pan and you’ll have enough to serve a crowd or have lots of leftovers for lunches.  It reheats beautifully!

Easy Ravioli Lasagna
 
Yields: 4 to 6 servings
Ingredients
  • 1½ cups pasta sauce (I use Muir Glen Tomato Basil)
  • 20-ounce package cheese ravioli (refrigerated or frozen)
  • 10 ounces frozen, chopped spinach, thawed and squeezed dry
  • 4 ounces (1 cup) shredded part-skim mozzarella
  • 2 tablespoons grated Parmesan
  • Crushed red pepper flakes, to taste (optional)
  • Cooking spray
Instructions
  1. Preheat oven to 375 degrees. Spray an 8-inch baking dish with cooking spray and set aside.
  2. Pour ½ cup pasta sauce over bottom of dish.
  3. Layer bottom of dish with half of the ravioli.
  4. Cover ravioli with ½ cup sauce and top with spinach and half of mozzarella (1/2 cup).
  5. Repeat with remaining ravioli, sauce and mozzarella. Sprinkle top with Parmesan and crushed red pepper flakes, if using.
  6. Cover dish with foil and bake for 30 minutes. Remove foil and bake until bubbling and starts to brown, about 10 minutes. Let cool for 5 minutes and then serve.

Slightly adapted from All You, March 2009

vegetarian spinach ravioli lasagna

Pasta Pizza Pie

mushroom pasta pizza bake pie

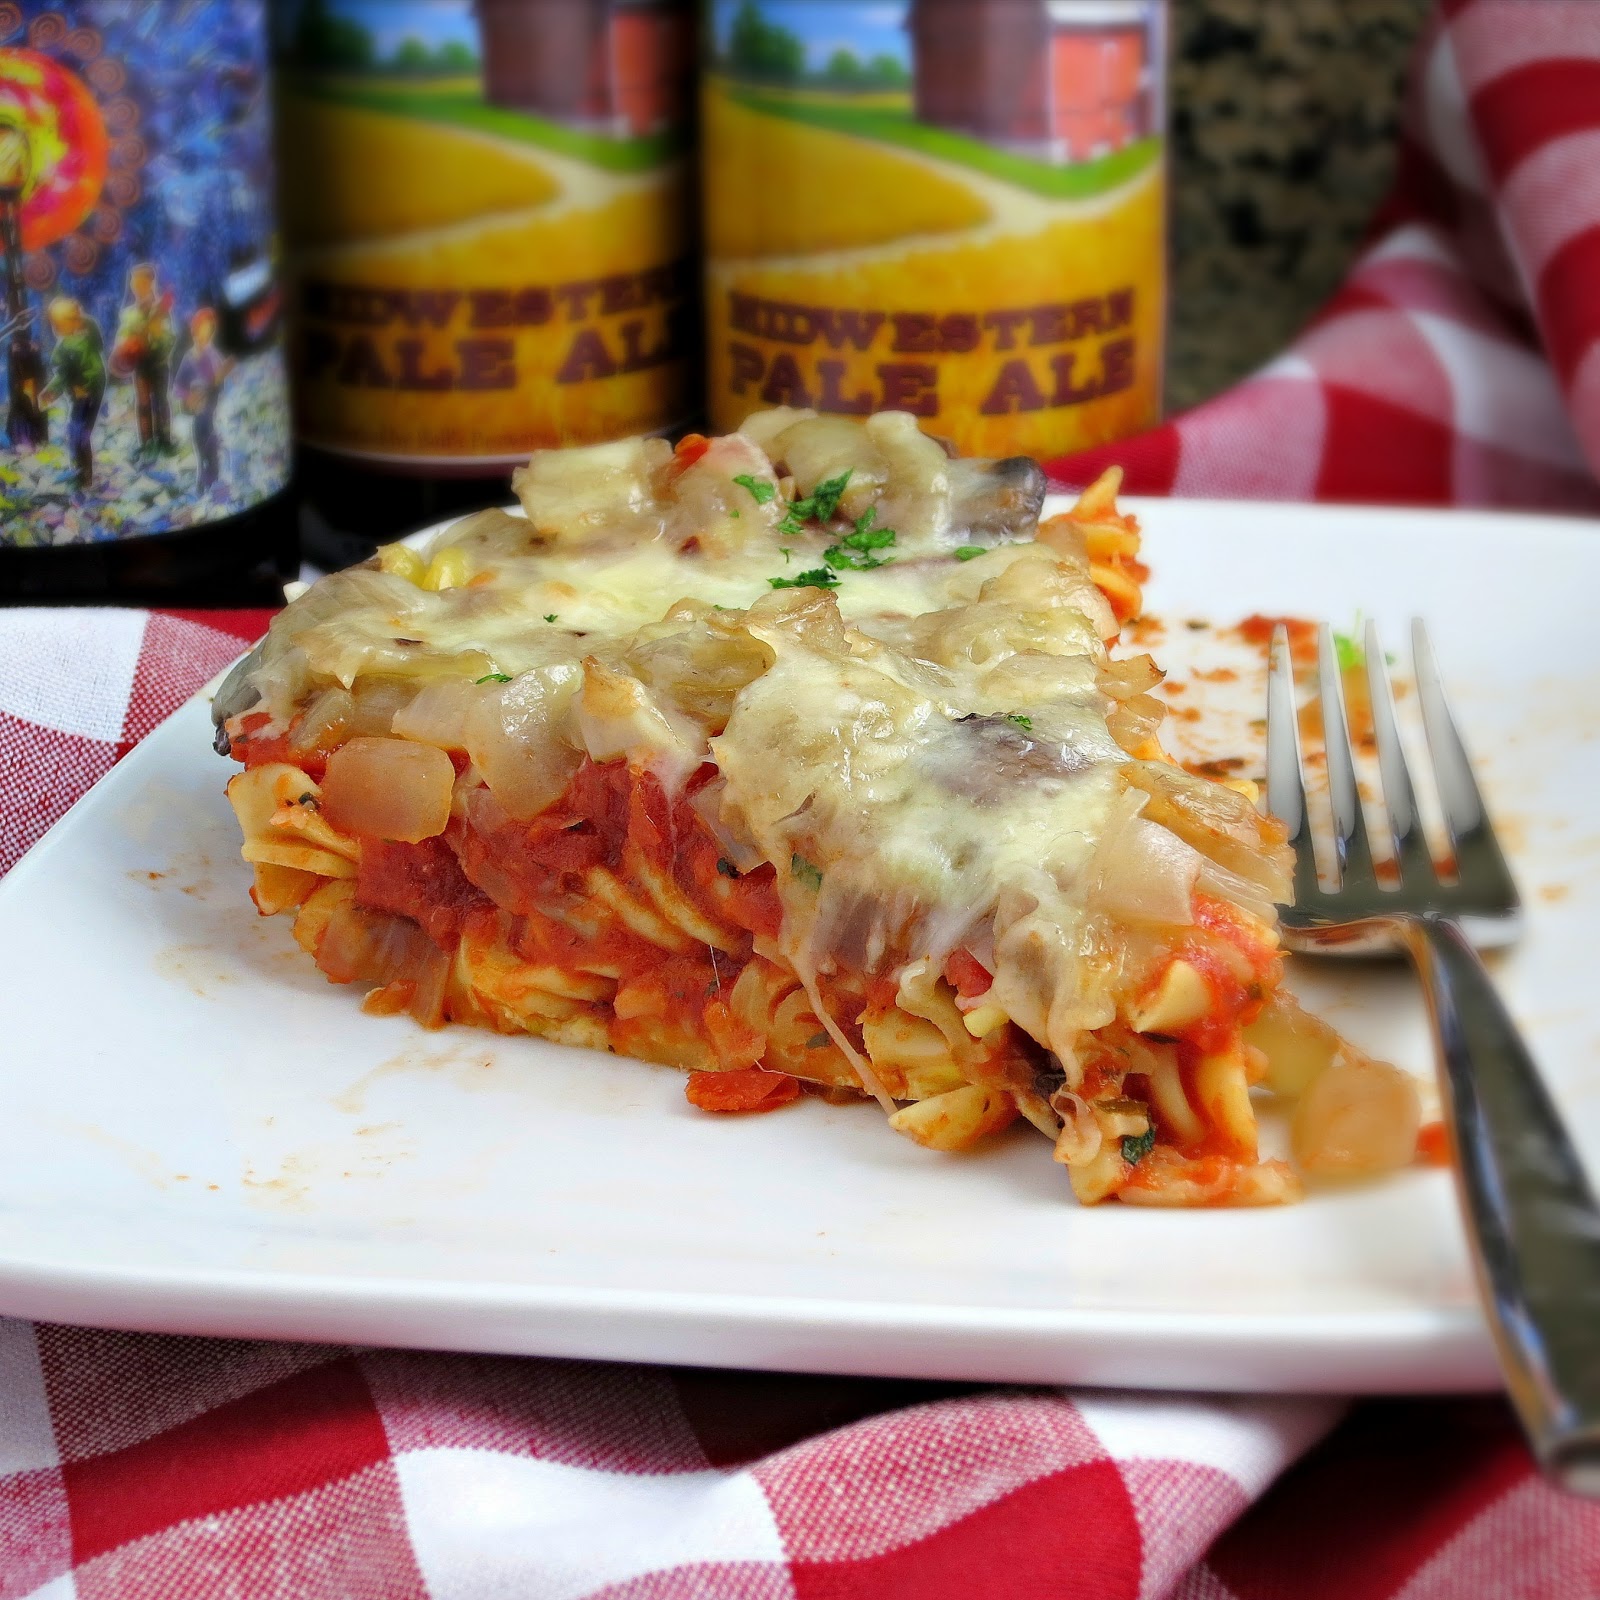
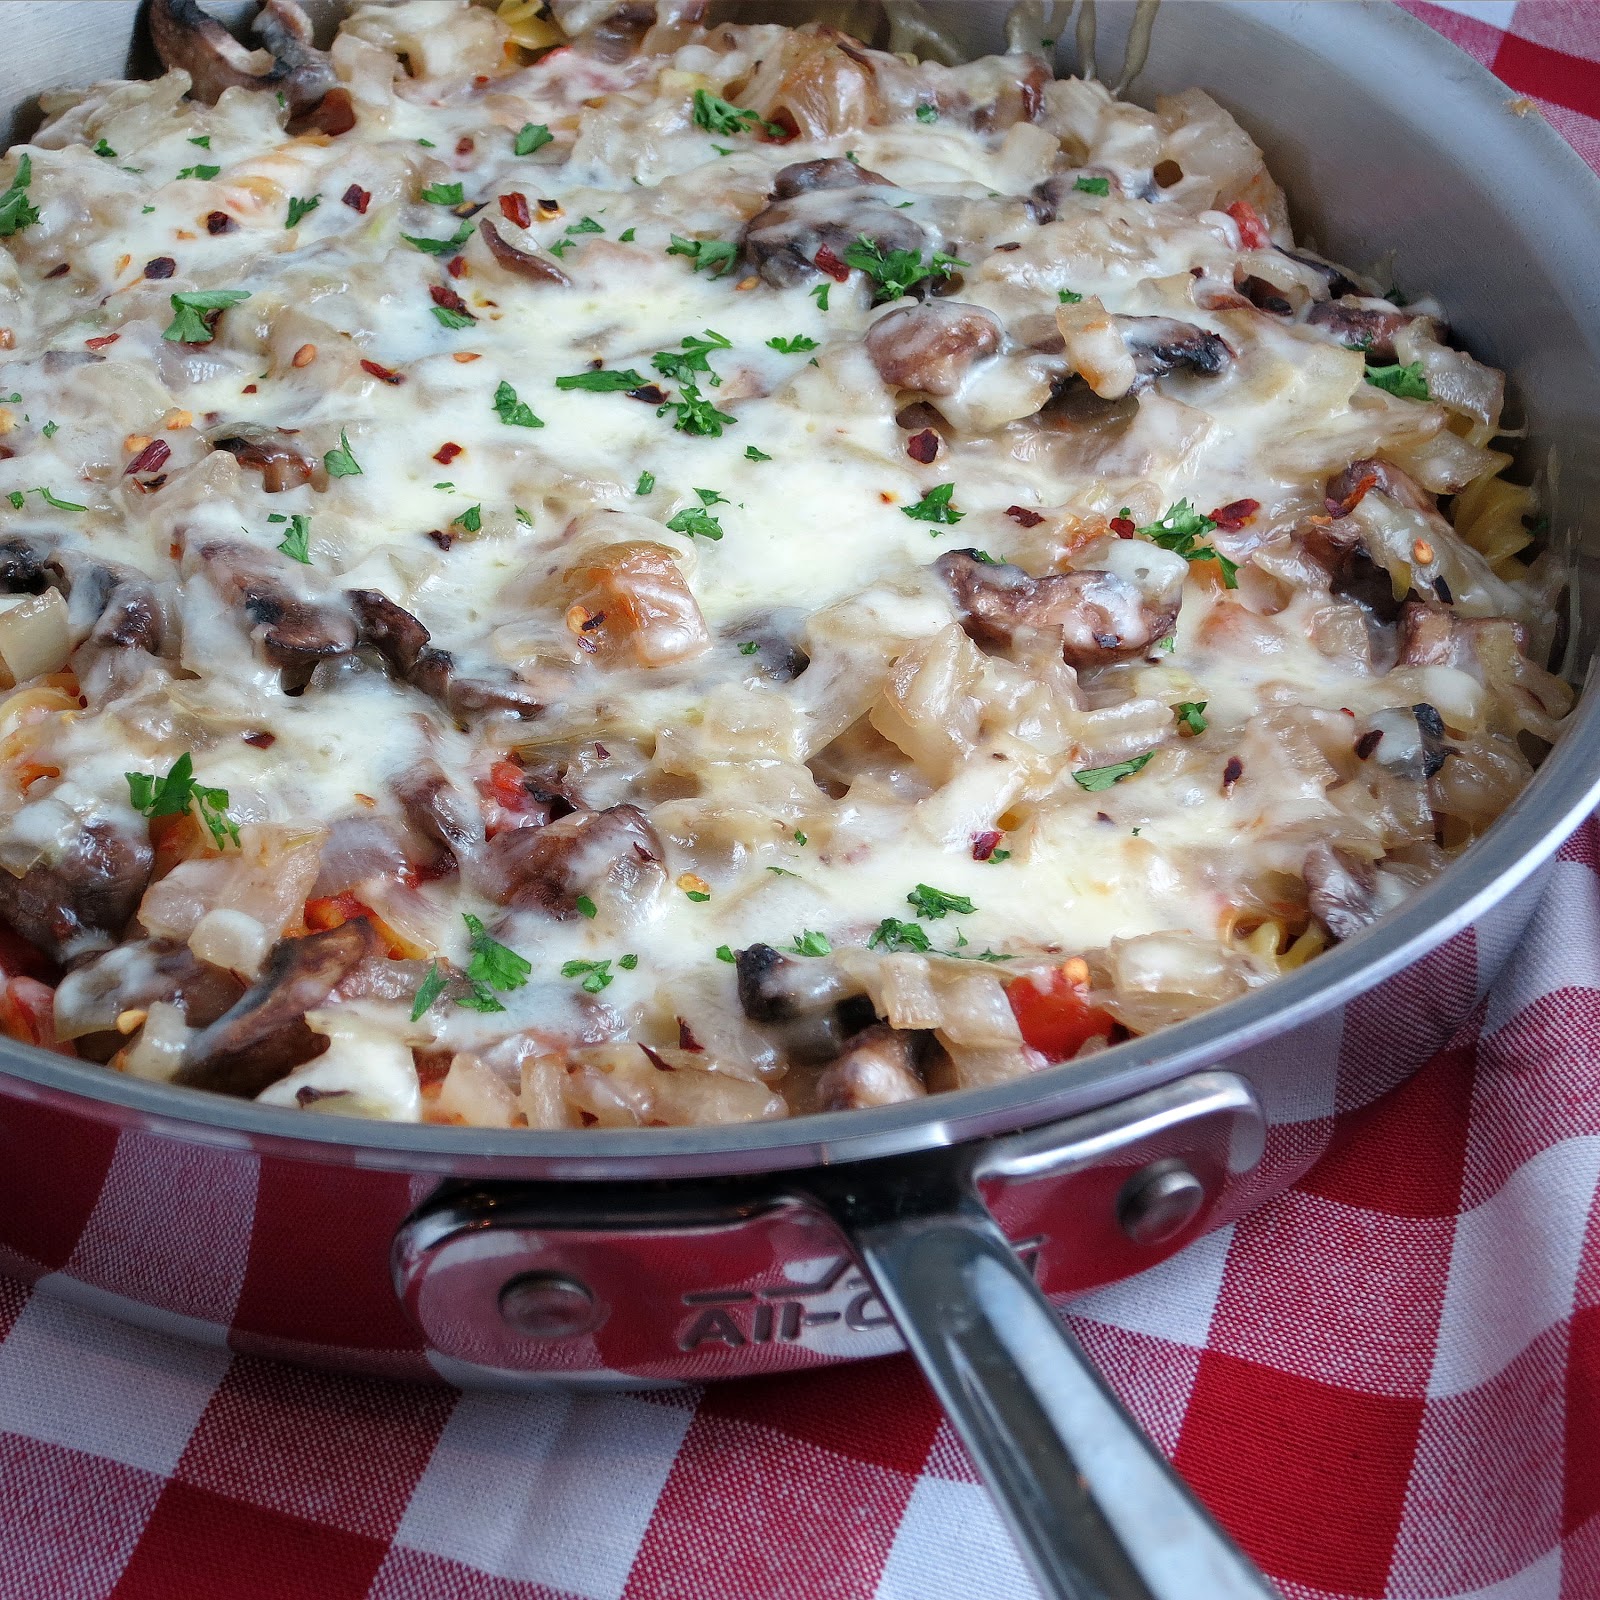
Pasta Pizza Pie combines two Italian favorites (and two of my favorites!) into a delicious pizza-inspired baked pasta.  First, you start by baking a pasta “crust.”  Then you spread your favorite pasta sauce over the crust and top it with your favorite toppings.  I used a 12-inch saute pan in lieu of a pizza pan, and it worked great!

Pasta Pizza Pie puts a fun twist on pizza and a fun twist on pasta,…and incidentally since it’s also a “pie,” this Pasta Pizza Pie is perfect for today, March 14th (3.14)…”Pi Day!”


Pasta Pizza Pie
 
Yields: 4 servings
Ingredients
  • Cooking spray
  • 1 tablespoon canola oil
  • 1 large onion, chopped*
  • 1 cup sliced mushrooms (I used baby bellas)*
  • 2 garlic cloves, minced *
  • 1 egg, beaten
  • ¼ cup milk (I used skim)
  • 8 ounces (1/2 of a 1 pound box) rotini-shaped pasta, cooked and drained
  • 1 cup shredded part-skim mozzarella cheese (about 4 ounces)
  • 1½ cups of your favorite pasta sauce (I used Muir Glen Tomato Basil)
  • crushed red pepper flakes, to taste
  • * substitute with your favorite pizza toppings
Instructions
  1. Preheat oven to 350 degrees. Spray 12-inch saute pan or pizza pan with cooking spray and set aside.
  2. In a large skillet, heat oil over medium heat. Add onion and mushrooms and cook until tender, about 5 to 7 minutes, stirring occasionally. In the last minute, add minced garlic and stir for 1 minute. Remove from heat.
  3. In a medium bowl, stir egg, milk, pasta and ½ cup cheese. Spread pasta mixture in prepared pizza pan. Bake this pasta crust for 20 minutes.
  4. Remove pasta crust from oven and spread sauce over crust. Top with onion-mushroom mixture. Sprinkle with remaining cheese. Shake crushed red pepper flakes over cheese.
  5. Bake for 15 minutes, or until cheese is melted. Let stand 5 minutes before serving.

Source: Campbell’s Kitchen

Healthy Banana Cookies - vegan, no added sugar and nut free | alidaskitchen.com

Healthy Banana Cookies

Healthy Banana Cookies - vegan, no added sugar and nut free | alidaskitchen.com
 Healthy Banana Cookies are a chewy, fruit-filled cookie made using some of my favorite foods – oats, dates and bananas.  They are made from simple, wholesome ingredients, have no butter and added sugar, thus making them a healthier choice.  I love the simplicity of these cookies and have to admit these cookies made a delightful breakfast!  These Healthy Banana Cookies also happen to be dairy free and can be gluten free.
Healthy Banana Cookies from Alida's Kitchen

I have had this at the top of my ‘to make’ pile for months just waiting for some super ripe bananas.   While we always have plenty of super ripe bananas in the house, they’re typically reserved for Pumpkin Banana Muffins or Pumpkin Banana Pancakes (or Strawberry Banana Pancakes once strawberry season hits).  Fortunately, I was a muffin and pancake making machine in advance of our new baby’s arrival, stocking the freezer full of Adam’s favorite banana goodies.  With a stocked freezer and 3 very ripe bananas, it was finally my opportunity to try these Healthy Banana Cookies!

Healthy Banana Cookies | alidaskitchen.com
Healthy Banana Cookies
 
Yields: approx. 24 cookies
Ingredients
  • 3 very ripe bananas
  • 2 cups rolled oats (old-fashioned or quick cooking work fine)
  • 1 cup (8 ounces) pitted dates, chopped
  • ⅓ cup canola oil
  • 1 teaspoon vanilla extract
  • 1 teaspoon cinnamon
Instructions
  1. Preheat oven to 350 degrees. Line cookie sheets with parchment paper and set aside.
  2. In a large bowl, mash bananas. Add oats, dates, oil, vanilla and cinnamon, and mix well. Let sit for 15 minutes.
  3. Drop dough by rounded teaspoonful onto prepared cookie sheets. [Note: the cookies don't spread so you may want to shape them a bit]
  4. Bake cookies for 20 minutes, or until they are golden brown. Let cool on cookie sheet for 5 minutes and then move to a wire rack to cool completely.
Notes
These are best enjoyed the day after baking.
healthy banana cookies vegan dates oats

Coincidentally, this is also the first month of the Eating the Alphabet Healthy Recipe Challenge for 2013, hosted by Brenda of Meal Planning Magic.  Each month, several bloggers will focus on healthy recipes featuring fruits, vegetables grains or legumes, from a couple different letters (this month it is A or B).  I thought Healthy Banana Cookies would be the perfect healthy recipe to start off this fun series.

Baked Balsamic Chicken | alidaskitchen.com

Baked Balsamic Chicken

Tracking Pixel

Baked Balsamic Chicken is wholesome, easy and delicious!  This dish can be customized to use whatever herbs you like (or have on hand) and is perfectly paired with Minute® Multi-Grain Medley! Thank you Minute® Rice for sponsoring this post.
Baked Balsamic Chicken | alidaskitchen.com
 This Baked Balsamic Chicken recipe has been a family favorite for years. The recipe was created when Greta was first born over 3 years ago and has been a regular feature on the dinner rotation ever since. The marinade takes minutes to prepare and then is poured in a zip-top bag with the chicken.  Let that sit in the refrigerator until you’re ready to bake.  Then you just pour the chicken and marinade in a baking dish and bake.  Simple!

Read more

Lemon Buttermilk Cake

easy lemon buttermilk breakfast pound cake


We had a special surprise arrive last Friday ~ our baby decided to arrive a little early!  Naturally, when there is a birthday, there must be a birthday cake.  This Lemon Buttermilk Cake is quick and easy enough for a sleepy mama to whip together in minutes.  It’s not only simple to make, but the lemon cake is perfectly lemon-y, refreshing and delicious.  To dress it up, I added a simple lemon buttermilk glaze to drizzle over the loaf, with some extra to drizzle on the slices.  This cake is so good as-is, but the glaze adds a little something that makes it feel extra special.  Adam could not get enough of the baby’s birthday cake, and I discovered that despite not being a frosting person, he loves glaze.  Who can blame him!

Now to the baby details!  We had a baby girl named Greta Rose.  She is an easy baby so far and super sweet.  Seems fitting I guess, because the same could be said about Lemon Buttermilk Cake! 🙂

easy lemon buttermilk breakfast pound cake with lemon glaze


Lemon Buttermilk Cake
 
Yields: 8 to 10 servings
Ingredients
  • 2 cups all-purpose flour
  • 2 teaspoons baking powder
  • ½ teaspoon salt
  • 1½ cups granulated sugar
  • ½ cup canola oil
  • ¾ cup buttermilk, well-shaken
  • 2 eggs
  • 1 tablespoon lemon zest (finely grated, approx 2 lemons)
  • ¼ cup lemon juice (approx 1½ lemons)
  • 1 teaspoon vanilla extract
  • Cooking spray
  • GLAZE:
  • 1 cup powdered sugar
  • 1½ tablespoons fresh lemon juice
  • 1 to 2 tablespoon(s) buttermilk, well-shaken
Instructions
  1. Preheat oven to 350 degrees. Spray 8"x4" loaf pan with baking spray and set aside.
  2. In a large bowl, whisk together flour, baking powder and salt.
  3. In a medium bowl, add the sugar, oil, buttermilk, eggs, zest, juice and vanilla and whisk to combine.
  4. Add buttermilk mixture to flour mixture and whisk to combine. Pour into prepared loaf pan.
  5. Bake for 65 to 75 minutes, or until a toothpick inserted into the center comes out clean. Let cool in pan for 15 minutes and then transfer to a wire rack to cool completely.
  6. To prepare glaze, in a small bowl, whisk the powdered sugar, lemon juice and buttermilk until well-blended. Drizzle over cooled cake, as desired.

Sources: Real Simple for the cake, Cooking Light for the glaze
healthy oatmeal raisin buttermilk pancakes

Oatmeal Raisin Cookie Pancakes

healthy oatmeal raisin buttermilk pancakes

Oatmeal Raisin Cookie Pancakes are an easy, healthy, delicious breakfast treat that taste like oatmeal raisin cookies.  Yum!  They are made with the hearty goodness of oatmeal and whole wheat flour, sweetness from brown sugar and raisins and buttermilk, which of course makes everything good.

The first morning after I made these, Adam polished off six pancakes.  In fact, he ate that first batch so quickly, I wasn’t able to get any pictures.  Because he loved them so,  I made another batch a couple days later.  Fortunately, one afternoon I found myself with three pancakes and a good napper, so I was able to quickly snap some pics to share this wonderful recipe with you!

healthy oatmeal raisin buttermilk pancakes

Oatmeal Raisin Cookie Pancakes
 
Yields: 4 to 6 servings
Ingredients
  • 2 cups quick oats
  • 2 cups buttermilk
  • ½ cup whole wheat pastry flour
  • 2 tablespoons brown sugar
  • 1 teaspoon baking powder
  • 1 teaspoon baking soda
  • 1 teaspoon cinnamon
  • 2 eggs, lightly beaten
  • 2 tablespoons canola oil
  • 1 teaspoon vanilla
  • ½ cup raisins
Instructions
  1. In a medium bowl, combine oats and buttermilk and let sit for 5 minutes.
  2. Meanwhile, in a large bowl, whisk together the flour, brown sugar, baking powder, baking soda, and cinnamon.
  3. After 5 minutes, add eggs, oil and vanilla to buttermilk mixture, whisking until combined.
  4. Add buttermilk mixture to flour mixture, stirring until just moistened (Note: batter may be lumpy). Add raisins, folding until combined. Let sit for 10 minutes.
  5. Preheat nonstick skillet to medium heat and spray with cooking spray.
  6. Spoon batter onto skillet by the ¼ cupful (adjust to desired size) (Note: If batter is a little thick, use the back of your spoon to spread/shape the pancakes). Cook for 3 to 4 minutes, or until bubbles form and the edges look set. Flip pancakes and cook for another 2 to 3 minutes, or until golden.

Slightly adapted from Taste of Home