Categories

Chipotle-Glazed Roast Chicken with Sweet Potatoes

baked chipotle chicken with roasted sweet potatoes


I found this recipe for Chipotle-Glazed Roast Chicken with Sweet Potatoes during a sleepless night over the summer.  While it sounded absolutely delicious, it didn’t quite scream “summer” to me…so I saved it for a more seasonably appropriate time.  After many months of anticipation, I am happy to report this recipe was definitely worth the wait!

First you give the potatoes a head start by cooking them until they start to get tender.  The timing on this may vary based on the size you cut your potatoes or your oven, but unless you like crunchy potatoes, this step is key to the success of the recipe.  Meanwhile, you can whip up the sauce/rub and prepare the chicken.  Then you just put the chicken on top of the potatoes and pop it in the oven to bake until the chicken is done.  This recipe really could not be any simpler.  The result is a light and healthy dish that is sweet, spicy and delicious!

Chipotle-Glazed Roast Chicken with Sweet Potatoes
 
Yields: 4 servings
Ingredients
  • 2 sweet potatoes (10 ounces each) cut into ½-inch cubes
  • 2 tablespoons olive oil
  • 4 chipotle chiles in adobo sauce, minced
  • 2-3 garlic cloves, minced
  • 2 tablespoons honey
  • 2 teaspoons cider vinegar
  • 1 teaspoon salt, plus additional to taste
  • 1 teaspoon cumin
  • ½ teaspoon cinnamon
  • 1 pound boneless skinless chicken breasts, cut into 4 4-ounce portions
  • 2-3 green onions, chopped (optional, for garnish)
  • Cooking spray
Instructions
  1. Preheat oven to 400 degrees. Spray a roasting or baking pan with cooking spray and set aside.
  2. In a medium bowl, toss sweet potatoes with olive oil and pour in the bottom of roasting/baking pan. Roast for 15 to 20 minutes (tossing after 10 minutes), until potatoes being to get tender.
  3. Meanwhile, in a small bowl, combine chiles, garlic, honey, vinegar, salt, cumin, and cinnamon. Rub mixture over chicken breasts.
  4. Place chicken breasts on top of sweet potatoes and roast until chicken is cooked thoroughly, about 25 to 30 minutes. Serve garnished with green onions.

Adapted from Fitness Magazine

healthy oatmeal raisin buttermilk pancakes

Oatmeal Raisin Cookie Pancakes

healthy oatmeal raisin buttermilk pancakes

Oatmeal Raisin Cookie Pancakes are an easy, healthy, delicious breakfast treat that taste like oatmeal raisin cookies.  Yum!  They are made with the hearty goodness of oatmeal and whole wheat flour, sweetness from brown sugar and raisins and buttermilk, which of course makes everything good.

The first morning after I made these, Adam polished off six pancakes.  In fact, he ate that first batch so quickly, I wasn’t able to get any pictures.  Because he loved them so,  I made another batch a couple days later.  Fortunately, one afternoon I found myself with three pancakes and a good napper, so I was able to quickly snap some pics to share this wonderful recipe with you!

healthy oatmeal raisin buttermilk pancakes

Oatmeal Raisin Cookie Pancakes
 
Yields: 4 to 6 servings
Ingredients
  • 2 cups quick oats
  • 2 cups buttermilk
  • ½ cup whole wheat pastry flour
  • 2 tablespoons brown sugar
  • 1 teaspoon baking powder
  • 1 teaspoon baking soda
  • 1 teaspoon cinnamon
  • 2 eggs, lightly beaten
  • 2 tablespoons canola oil
  • 1 teaspoon vanilla
  • ½ cup raisins
Instructions
  1. In a medium bowl, combine oats and buttermilk and let sit for 5 minutes.
  2. Meanwhile, in a large bowl, whisk together the flour, brown sugar, baking powder, baking soda, and cinnamon.
  3. After 5 minutes, add eggs, oil and vanilla to buttermilk mixture, whisking until combined.
  4. Add buttermilk mixture to flour mixture, stirring until just moistened (Note: batter may be lumpy). Add raisins, folding until combined. Let sit for 10 minutes.
  5. Preheat nonstick skillet to medium heat and spray with cooking spray.
  6. Spoon batter onto skillet by the ¼ cupful (adjust to desired size) (Note: If batter is a little thick, use the back of your spoon to spread/shape the pancakes). Cook for 3 to 4 minutes, or until bubbles form and the edges look set. Flip pancakes and cook for another 2 to 3 minutes, or until golden.

Slightly adapted from Taste of Home

Pumpkin Bundt Cake from Alida's Kitchen

Pumpkin Bundt Cake

This easy Pumpkin Bundt Cake recipe takes less than 10 minutes to make using simple pantry ingredients!Pumpkin Bundt Cake | alidaskitchen.com

Pumpkin Bundt Cake is a simple and delicious pumpkin pound cake, with warm spices and pumpkin-y goodness throughout.  What attracted me to this recipe, aside from a slight pumpkin obsession, is that the ingredients are simple pantry items that I have on hand at all times.  What made me fall in love with the recipe, aside from it being delicious, was how easy it was to make. The batter took me less than 10 minutes to whip together.  Then bake for about an hour, let it cool, and voila!  You have an elegant and versatile dessert that will happily feed a crowd or, in our case, treat a small family for a week. :)

Pumpkin Bundt Cake

Not only will this Pumpkin Bundt Cake be excellent served alongside your holiday cookie platter, but it would also be a tasty alternative at Thanksgiving dinner or even served at a brunch.

Pumpkin Bundt Cake
 
Yields: 24 servings
Ingredients
  • 3 cups all-purpose flour
  • 2 teaspoons baking soda
  • 2 teaspoons cinnamon
  • 1 teaspoon pumpkin pie spice
  • ½ teaspoon salt (optional)
  • 2½ cups granulated sugar
  • 1 cup canola oil
  • 3 eggs
  • 1 teaspoon vanilla extract
  • 1 can (15 ounces) pumpkin
  • powdered sugar, for dusting
Instructions
  1. Preheat oven to 350 degrees. Spray 10-inch bundt pan with cooking spray and set aside.
  2. In a medium bowl, whisk together the flour, baking soda, spices and salt.
  3. In a large bowl, beat sugar and oil until combined. Add eggs, one at a time, beating well after each addition, and add vanilla with the last egg.
  4. To the egg mixture, alternate adding flour mixture and pumpkin, beating well on medium-low after each addition.
  5. Pour into prepared bundt pan. Bake for 60 to 65 minutes, or until a tootpick inserted in the center comes out clean. Cool for 10 minutes before inverting onto a wire rack. Let cool completely and then dust with powdered sugar before serving.

Slightly adapted from Taste of Home

Pumpkin Bundt Cake | alidaskitchen.com

Black Bean Nacho Burgers

Black Bean Nacho Burgers | alidaksitchen.com

Black Bean Nacho Burgers are a healthy, spicy, cheesy burger that tastes just like black bean nachos! {vegetarian}

As we all know, October is National Breast Cancer Awareness Month.  In honor and recognition of this, my friend Erin at Dinners, Dishes and Desserts contacted me about joining a bunch of bloggers together this week to share pink recipes or healthy recipes that are helpful for fighting cancer.  What a great idea!  So this week I will be sharing 2 recipes ~ today’s being the healthy one ~ Black Bean Nacho Burgers.

Some studies suggest a link between red meat consumption and breast cancer.  While we don’t eat a lot of red meat in this house, I am always happy to find new substitutes for red meat standbys, such as a burger.  Sometimes a burger really hits the spot, right?  Even though it is an occasional indulgence, after having these Black Bean Nacho Burgers, I will be happy to never have a beef burger again!  They are super easy to make, with a simple list of ingredients, and really do taste like black bean nachos!   Made with black beans, crushed tortilla chips, some cheese, salsa and seasonings, these are a truly delicious healthy alternative to their red meat counterpart.  Even Mike, who as I’ve mentioned before is a bit of a burger connessieur, thought they tasted incredible and did not miss the red meat.

Black Bean Nacho Burgers
 
Yields: 4 patties
Ingredients
  • 15 ounce can black beans, drained and rinsed
  • ½ cup finely crushed tortilla chips
  • ⅓ cup salsa
  • ½ cup shredded cheddar cheese
  • 1 egg, lightly beaten
  • 1 scallion, white and green, finely chopped
  • black pepper, to taste
  • hamburger buns, lettuce, cheese, salsa, etc. for serving
Instructions
  1. Using a potato masher, fork or a food processor, smash bean until chunky, leaving some partly whole.
  2. Stir in chips, salsa, cheese, egg, scallion and pepper. Refrigerate for 10 to 15 minutes, and then form mixture into 4 patties.
  3. Place patties on plate, cover with plastic wrap and refrigerate 30 minutes to overnight.
  4. Preheat oven to 375 degrees. Line a baking sheet with parchment paper.
  5. Place patties on prepared baking sheet and bake for about 10 on each side, or until browned and cooked through. (Note: Patties will be a little fragile when flipping).
  6. Serve on a bun with desired toppings.

Adapted from Fitness Magazine

Black Bean Nacho Burgers | alidaskitchen.com

Fontina and Mascarpone Baked Pasta

fontina and mascarpone  mac 'n cheese

Every time I make Baked Tortellini with Spinach, I am left with 6 ounces of fontina cheese.  While I would happily make it 3 more times, I have also had this Fontina and Mascarpone Baked Pasta dish on my list of things to make for some time now.   The first time I made this dish without mushrooms, and it was good, but I felt it needed something more.  It needed mushrooms.  Mushrooms are not typically my go-to for anything, but it really cried out for something earthy and meaty.  Sauteed in a little garlic, the mushrooms were the perfect addition to this dish.  I used some Parmesan cheese for some of the fontina in the original recipe to give the recipe a little more bite.  Topped with buttery, garlic breadcrumbs, Fontina and Mascarpone Baked Pasta is a delicious and sophisticated twist on macaroni and cheese ~ perfect for company or Sunday dinner comfort food.

Looking to use up the leftover mascarpone cheese?  Try Porcini Mushroom and Spinach Risotto with Mascarpone

Fontina and Mascarpone Baked Pasta
 
Yields: 8 servings
Ingredients
  • 1 pound medium pasta shells, uncooked (penne or other similar shaped pasta works too)
  • ¼ cup all-purpose flour
  • 3 cups skim milk
  • 1¾ cups (6 ounces) shredded fontina cheese
  • ¼ cup (2 ounces) shredded Parmesan cheese
  • ¼ cup (2 ounces) mascarpone cheese
  • Salt and black pepper, to taste
  • 8 ounces sliced mushrooms (I use baby bellas)
  • 1 clove garlic, minced
  • Cooking spray
  • ¼ cup breadcrumbs
  • 1 tablespoon butter (I use light butter)
  • 1 small garlic clove, minced
  • 1½ tablespoons chopped fresh parsley
Instructions
  1. Cook pasta according to package directions, drain and keep warm.
  2. Preheat oven to 350 degrees.
  3. Combine flour and milk in a large sauce pan over medium heat, stirring constantly with a whisk, and cook for about 10 minutes or until mixture starts to thicken.
  4. Meanwhile, in a nonstick skillet sprayed with cooking spray, saute mushrooms, with a pinch of salt, until softened (about 5 to 7 minutes). Add 1 clove of minced garlic in the last minute, if desired.
  5. Remove milk mixture from heat and add cheeses, whisking until mixture is smooth. Add salt and pepper, to taste.
  6. Add cooked pasta and mushrooms, stirring to coat and combine.
  7. Spray a 13x9-inch baking pan with cooking spray and pour pasta mixture into pan.
  8. Meanwhile, melt butter in a small skillet over medium heat. Add garlic and cook for 30 seconds, or until fragrant. Remove from heat and add breadcrumbs, stirring to coat. Sprinkle breadcrumbs over pasta mixture.
  9. Bake uncovered for 25 minutes, or until bubbly. Sprinkle with parsley and serve.

Adapted from Cooking Light, November, 2006

Pumpkin Banana Muffins

Pumpkin Banana Muffins put a Fall twist on banana bread with the perfect balance of pumpkin and banana. 
Pumpkin Banana Muffins | alidasktichen.com
Pumpkin Banana Muffins are a huge hit in our household. They are made with whole wheat flour, bumping the nutrition value.  The pumpkin and banana make for a moist muffin, so not a lot of oil is needed.  I typically make these as a combination of mini muffins (24) and standard muffins (3) and freeze half of the mini muffins.

So last week was Adam’s first day of preschool. I decided to make Pumpkin Banana Muffins as a special surprise after school. Pumpkin Banana Muffins are his favorite muffin of all time, so I knew they would be a hit.  He loved school and was welcomed home with his favorite treat.  It is safe to say, he had the best day!

Pumpkin Banana Muffins | alidasktichen.com

Pumpkin Banana Muffins
 
Yields: 30 mini-muffins (or 15-18 standard muffins)
Ingredients
  • 2 cups whole wheat pastry flour or all-purpose flour (or 1 cup all-purpose flour/1 cup whole wheat flour)
  • ½ cup brown sugar, packed
  • 1 teaspoon baking powder
  • ½ teaspoon baking soda
  • 1 teaspoon cinnamon
  • 1 teaspoon pumpkin pie spice
  • 2 bananas, mashed
  • 1 cup pumpkin puree
  • ¼ cup canola oil
  • 2 eggs
  • 1 teaspoon vanilla
Instructions
  1. Preheat oven to 350 degrees. Spray muffin tins with baking spray and fill empty cups with water. Set aside.
  2. In a large bowl, whisk together the flours, sugar, baking powder, baking soda, cinnamon, and pumpkin pie spice.
  3. In a separate bowl, whisk the bananas, pumpkin, oil, eggs and vanilla, until well-blended.
  4. Add banana mixture to flour mixture, gently folding until combined.
  5. Divide mixture evenly among prepared muffin cups.
  6. Bake for 11 to 13 minutes for mini muffins / 13 to 15 minutes for standard muffins, or until a toothpick inserted in the center comes out clean.

ETA 10/19/12:  I have made these several times since posting and have experimented with different flours, since white whole wheat flour isn’t an ingredient I always have on hand.  All whole wheat pastry flour works really well, and the recipe has been updated below accordingly.

Pumpkin Banana Muffins {alidaskitchen.com}

Source: Pumpkin Banana Bread

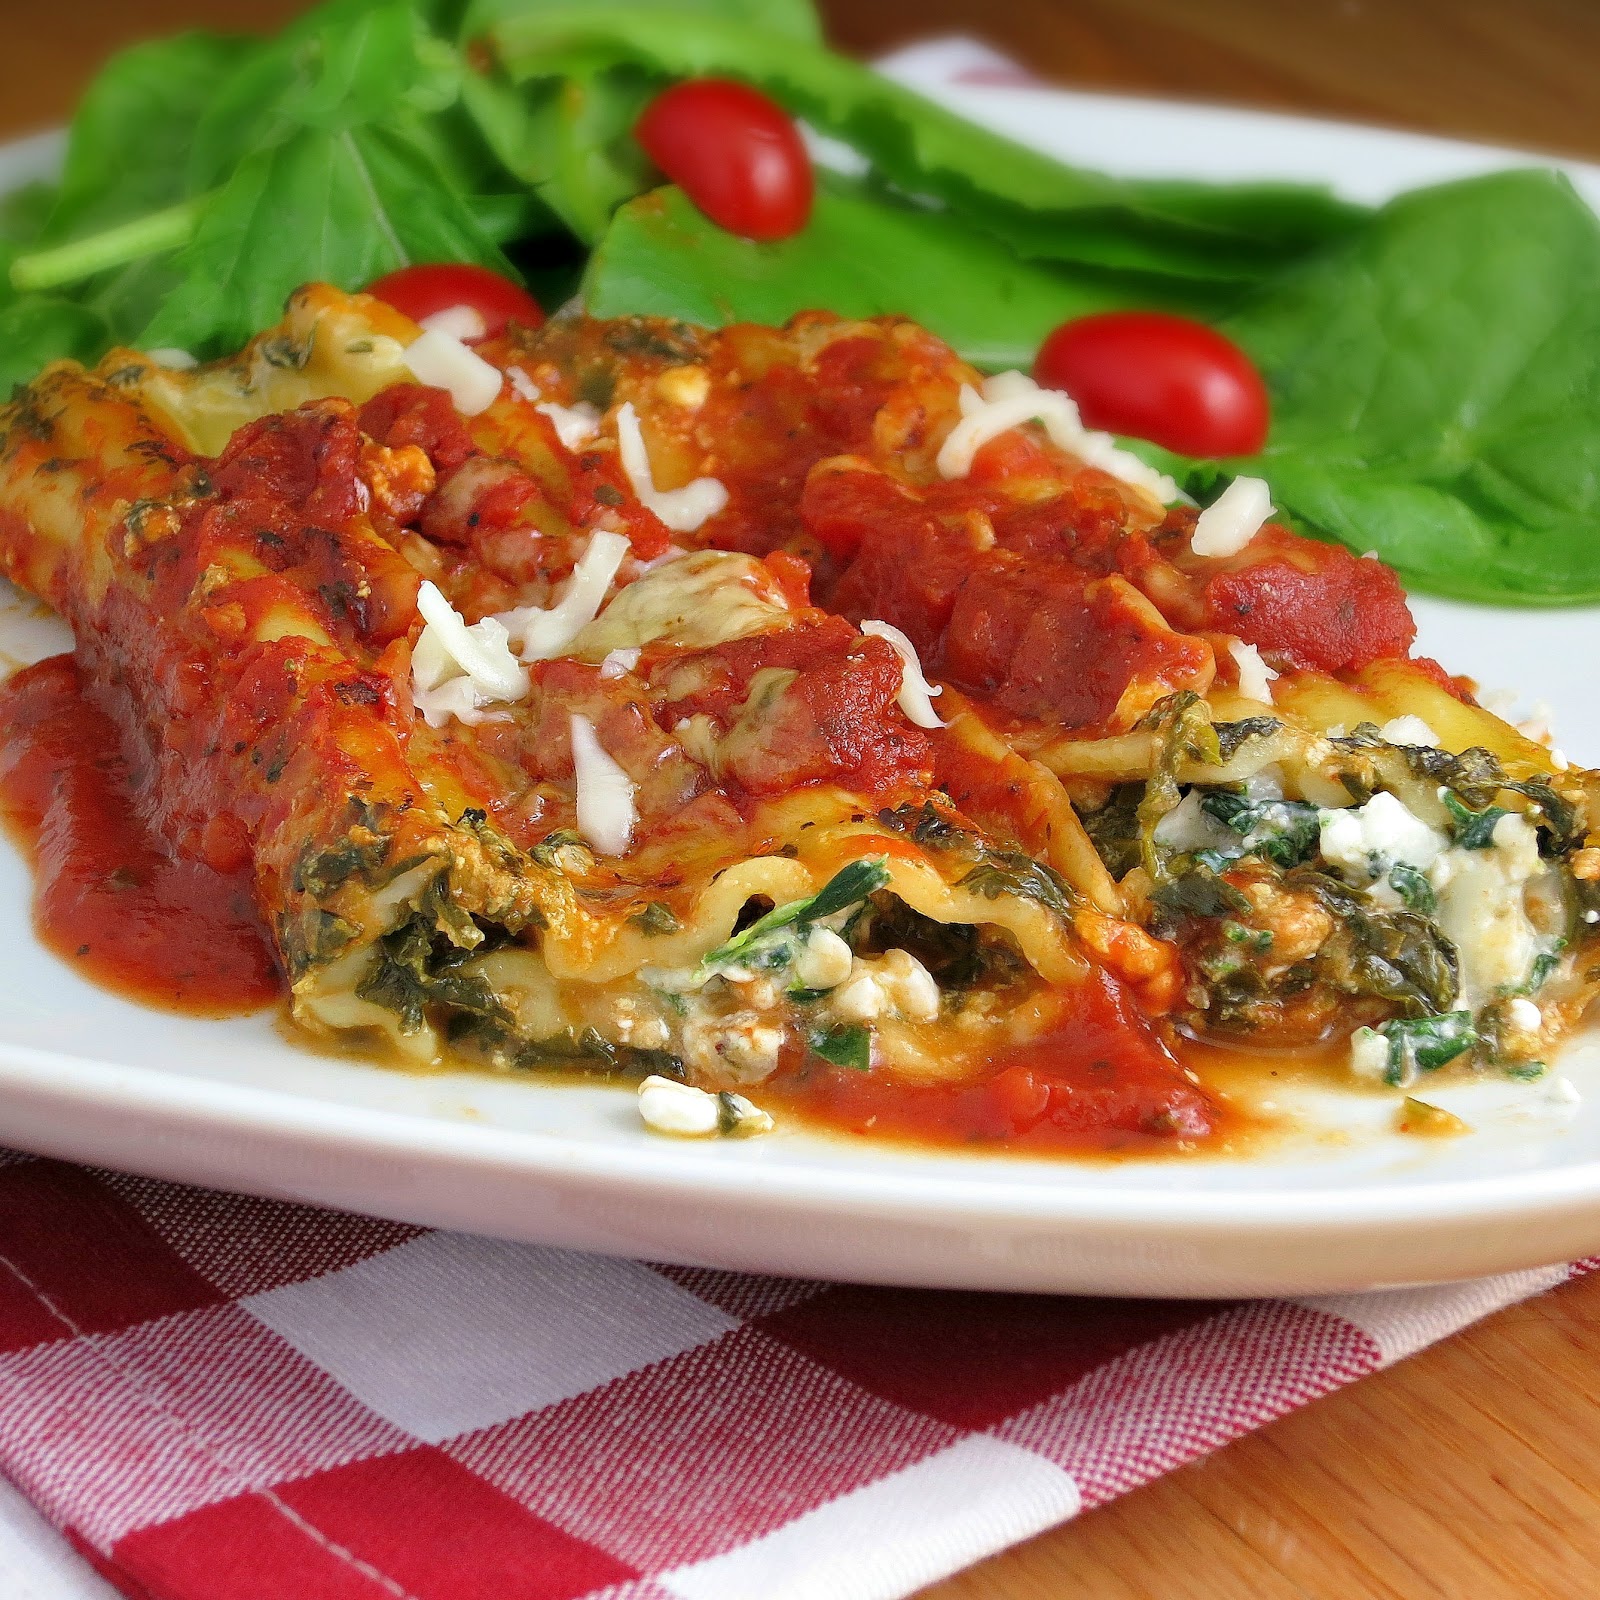
easy vegetarian spinach manicotti with no boil noodles

Easy Meatless Manicotti

Easy Meatless Manicotti | alidaskitchen.com


I don’t know about you, but I am very excited for Fall.  It is my favorite time of year for cooking and baking, plus I love the cooler temperatures.  Even though the season has not technically changed, Labor Day is kind of an unofficial kick off to the Fall season.  At least that’s what I’m telling myself.  I have already made a pumpkin pie, pumpkin pancakes, chili and cornbread, beef stew, and a few other Fall-inspired goodies to be posted soon.  (Ok, confession…I may have done some of this before Labor Day).

In any case, this Easy Meatless Manicotti is one of my favorite dishes and is a perfect comfort food for the cooler temperatures.  There are a couple time-saving steps in this recipe to help make it “easy.”   First, no boiling of the noodles is required.  Not having to boil the noodles is not only a time-saver, but filling firm shells is a whole lot easier than flimsy cooked shells.  This recipe also uses a jarred pasta sauce, though if you want to make your own, go for it!  The filling is very flexible – I’ve used cottage cheese or ricotta, and either works fine.  I have used frozen broccoli in place of the spinach; I have added onions, shredded zucchini, whatever extra vegetables that needs to be used up.  Leftovers heat up beautifully, which make for great lunches or quick dinners.  Easy Meatless Manicotti is healthy and delicious and a regular in our dinner rotation.

easy vegetarian spinach manicotti with no cook noodles

Easy Meatless Manicotti
 
Yields: 7 servings
Ingredients
  • 2 cups (8 ounces) shredded part-skim mozzarella, divided
  • ¼ cup (1 ounce) grated parmesan cheese
  • 16 ounces nonfat cottage cheese
  • 10 ounces frozen spinach, thawed and squeezed dry
  • 3 garlic cloves, grated or minced
  • 1½ teaspoons dried Italian herb seasoning (or dried oregano)
  • ¼ teaspoon crushed red pepper flakes
  • Salt and Pepper, to taste
  • Cooking Spray
  • 3 cups marinara sauce (or 24-28 ounce jar pasta sauce)
  • 1 package (14 noodles) manicotti noodles - uncooked
  • ½ cup water
Instructions
  1. Preheat oven to 375 degrees.
  2. In a large bowl, combine 1½ cups mozzarella, Parmesan, and cottage cheese, along with the spinach, garlic, Italian herb seasoning, red pepper and salt/pepper to taste.
  3. Spray 13 x 9 baking dish with cooking spray. Pour ½ of the sauce in the baking dish.
  4. Fill the manicotti noodles* with filling mixture until full, about 3 tablespoons.
  5. Pour the remaining sauce over the noodles, making sure the noodles are covered.
  6. Slowly pour ½ cup water around the perimeter of baking dish. Sprinkle remaining ½ cup mozzarella cheese on top. Cover with nonstick foil (or spray foil with cooking spray) and bake for 1 hour. Let sit uncovered for 10 minutes and serve.
Notes
Filling tips: Put filling in a ziploc bag, cut off a corner and fill shells OR I have found an iced tea spoon is the perfect size for spooning the filling in the shells.
Nutrition Information
Serving size: 2 shells


Adapted from Cooking Light

Ginger Chicken Satay

Chicken Satay is one of my favorite chicken dishes.  While I doubt there will ever be anything that comes close my favorite recipe, I enjoy experimenting with different versions from time to time.  The thing that caught my eye in this particular version was the interesting use of pineapple juice.

The result was a subtle yet delicious Ginger Chicken Satay.  The flavors are mild yet interesting.  The pineapple juice isn’t obvious, but was indeed a tasty addition.  The heat can obviously be adjusted to taste with the crushed red pepper.   I’m not really a skewer fan, so I just grill the chicken directly instead of threading it on skewers.  If you want to do skewers, then cut the chicken into bite-sized pieces before marinating.  Then thread the chicken on the skewers once you are ready to fire up the grill.

Ginger Chicken Satay
 
Yields: 4 servings
Ingredients
  • 1 pound boneless, skinless chicken breasts or tenders
  • 1 cup pineapple juice
  • 6 tablespoons creamy peanut butter
  • 1 tablespoon sugar
  • 2 teaspoons red-wine vinegar
  • 2 teaspoons finely chopped ginger
  • 2 cloves garlic, chopped
  • Crushed red pepper, adjust to taste
Instructions
  1. Put the chicken in Ziploc bag.
  2. In medium bowl, combine pineapple juice, peanut butter, sugar, vinegar, ginger, garlic and crushed red pepper. Pour the marinade over chicken in the Ziploc bag. Refrigerate for at least 30 minutes to overnight.
  3. Preheat grill (or grill pan) to medium high. Cook chicken 3 to 5 minutes per side, or until chicken is cooked through. Serve with additional crushed red pepper, if desired.


Adapted from Fitness, May, 2011

Grilled Lemon Chicken with Parsley Sauce

Grilled Lemon Chicken with Parsley Sauce is a light and healthy dish that tastes like summer.  Plus it’s a great way to use some of the parsley that may be taking over your herb garden!  The lemon in the chicken is subtle and fresh tasting, which serves as a nice contrast to the tangy parsley sauce.  The marinade is quick and easy to make, using simple ingredients, and then pop the chicken in the refrigerator until you’re ready to grill.  As with any citrus marinade, it acts quickly so can be grilled within 15 minutes.  I’ve also let the chicken marinate overnight, and that works fine too.  For the parsley sauce, I just toss everything in my Magic Bullet (which I love any excuse to use!), and it’s done in a minute.  Easy! 

Grilled Lemon Chicken with Parsley Sauce
 
Yields: 4 servings
Ingredients
  • Chicken:
  • zest of 1 lemon (about 1 tablespoon)
  • 3 tablespoons lemon juice
  • 1 tablespoon extra-virgin olive oil
  • 2 garlic cloves, minced
  • ½ teaspoon salt
  • ¼ teaspoon black pepper
  • ⅛ teaspoon granulated sugar
  • 1 pound boneless, skinless chicken tenders or breasts (4 4-ounce breasts)
  • Sauce:
  • ⅔ cup parsley
  • 2 tablespoons extra-virgin olive oil
  • 1 tablespoon chopped shallot
  • 1 tablespoon white wine vinegar
  • 2 garlic cloves, minced
  • ¼ teaspoon salt
  • ¼ teaspoon black pepper
  • 2 tablespoons fresh lemon juice
Instructions
  1. Prepare marinade: In a bowl, whisk together zest, juice, oil, garlic, salt, pepper and sugar until combined.
  2. Put chicken in a Ziploc bag and pour marinade over chicken. Shake to coat and put in the refrigerator to marinate until ready to use (at least 15 minutes to overnight).
  3. Prepare sauce: In a blender, add parsley, oil, shallot, vinegar, garlic, salt, pepper, and juice. Blend until smooth (about 1 minute).
  4. Preheat grill. Place chicken on grill (discard marinade) and cook chicken on 4 to 5 minutes per side, or until thoroughly cooked.
  5. Serve chicken with a drizzle of sauce and garnish as desired. (Store any leftover marinade in the refrigerator).

Adapted from Health, July, 2006

Black Bean Brownies

Black Bean Brownies


Black Bean Brownies

Black beans and brownies…sounds crazy right?  Well, as many have discovered, using black beans in place of flour is a clever way to make brownies a bit healthier (and gluten free) without sacrificing a delicious chocolaty, rich-tasting dessert.  Black Bean Brownies have been on my list of things to make for years, and had I realized how easy they are to make, they would have been made a long time ago!  Essentially you just throw everything in a food processor (or blender), process for a minute, pour in pan and bake.

Then comes the true test…how are they?  Amazing!  Mike and I were both excited to try them and very pleasantly surprised how good they are (or were…the brownies are long gone!)  They have a deep chocolate flavor, a not quite cakey and not quite fudgy texture, and were some of the best brownies I’ve had in a long time!

Black Bean Brownies
 
Yields: 16 servings
Ingredients
  • 1 can (15 ounces) black beans, rinsed and drained
  • 3 eggs
  • 3 tablespoons canola oil
  • ½ cup unsweetened cocoa powder
  • ½ teaspoon baking powder
  • 1 teaspoon vanilla extract
  • ⅔ cup brown sugar, packed
  • ½ cup semi-sweet chocolate chips, divided
  • Cooking spray (or additional oil)
Instructions
  1. Preheat oven to 350 degrees. Spray a 8-inch square baking dish with cooking spray (or brush with oil) and set aside.
  2. Put black beans in a food processor and process until smooth.
  3. Add eggs, oil, cocoa, baking powder, vanilla and brown sugar, and process until completely blended. (Note: You may need to stop and scrape down the sides a couple times during this step).
  4. Add ¼ cup chocolate chips and pulse 5 times.
  5. Pour mixture in prepared baking dish. Sprinkle top with remaining chocolate chips.
  6. Bake for 30 to 35 minutes, or until a toothpick inserted in the center comes out clean. Put on a wire rack and let cool completely before serving.

Source:  Whole Living